Setting up a grow tent creates a controlled microclimate for plants and makes it easier to manage light, airflow, and humidity. This guide walks through a practical setup approach for a compact indoor system using a DWC (Deep Water Culture) hydroponic method to grow leafy greens such as perilla and baby leaf varieties. The process is designed to be actionable for beginners while highlighting key decisions that affect plant health.
1) Choose and assemble the grow tent
The first step is building the tent frame and fabric enclosure. A standard grow tent typically assembles quickly, often in the range of 10 to 20 minutes, depending on the model and hardware included. During assembly, attention should be paid to:
- Stability: ensure the frame locks firmly and stands level.
- Light integrity: check for seams and gaps that could allow stray light during dark periods.
- Accessibility: confirm the door location and internal space for working around plants.
Once assembled, the tent becomes the enclosure where all other components will be placed: lighting, ventilation, shelves, and the hydroponic reservoir system.
2) Install an internal shelf for layered growing
A shelf can increase usable space inside a small tent by allowing equipment placement and staged setups. In a prototype approach, the shelf may be slightly smaller than expected but still sufficient for the initial run. Common design choices include:
- Tiered shelving: using a multi-level shelf so the lower tiers can hold equipment and the upper tier can be reserved for plant trays.
- Selective use at first: starting with one tier and expanding later helps validate the system before scaling up.
Lighting placement should align with the shelf design. For example, a light can be installed at the bottom level if that position provides adequate coverage and safe distance to the plant canopy.
3) Set up a DWC hydroponic system for greens
DWC works by keeping plant roots in oxygenated nutrient solution. In practice, this can be built using a floating platform (commonly Styrofoam) and net pots or seed-starting sponges placed into holes drilled through the platform.
Step 3.1: Drill holes in the floating platform
Drill holes in the Styrofoam board to create planting sites. A practical starting radius is about 1.5 cm per hole. Spacing should be adjusted based on plant growth habits. For leafy greens, example spacing decisions include:
- Perilla: space holes about 15 cm apart.
- Baby leaf greens: space holes about 5 cm apart.
This spacing strategy supports different canopy sizes and reduces competition for light and nutrients.
Step 3.2: Prepare seed-starting sponges
Cut growing sponges into small squares, for instance around 2 cm each. Cutting slightly larger than the drilled holes helps keep the sponge locked in position so it does not slip as the platform floats.
Step 3.3: Plant seeds in the sponges
Create a small cross-shaped slit in each sponge, soak thoroughly, and place seeds into the slit. The goal is firm, consistent contact between the seed and the moist medium so germination can begin reliably.
Step 3.4: Fill the tray so the sponge is barely touching nutrient
Fill the reservoir tray with water so the bottom of each sponge lightly touches the water level. In DWC, the wider system requires oxygenation, but for the initial placement step, ensuring the sponge wick contact is a crucial foundation for stable early growth.
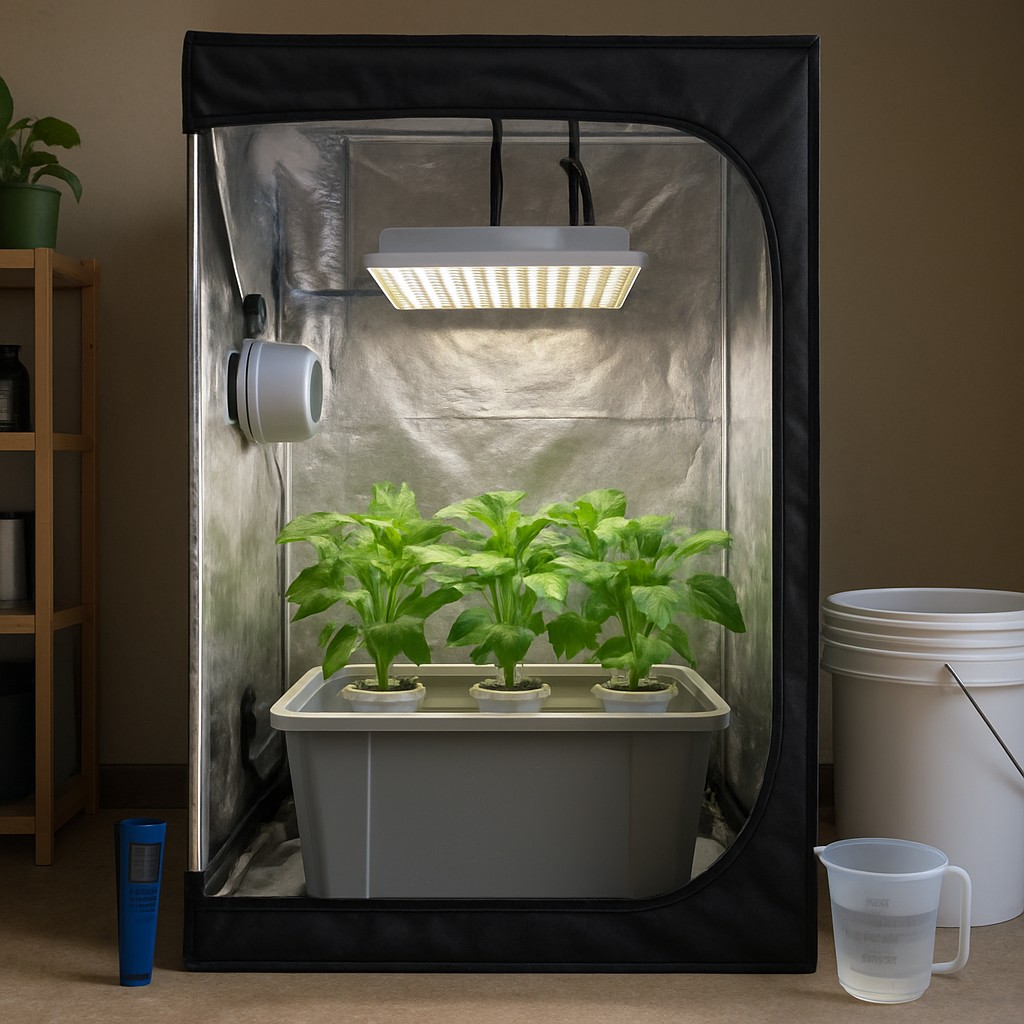
4) Dial in tent environment for faster, healthier growth
Even a well-built hydroponic system will underperform if airflow and lighting conditions are unstable. A complete tent setup should include:
- Lighting: a full-spectrum LED appropriate for tent size, with a way to adjust height.
- Ventilation: an inline exhaust fan, carbon filtration if odor control is needed, and ducting secured with clamps.
- Circulation: one or more small oscillating clip fans to reduce stagnant air.
- Monitoring: a thermometer/hygrometer positioned near the plant canopy height.
For leafy growth, target stable temperatures and humidity, and maintain airflow so plants transpire effectively without creating overly wet conditions. A useful principle is achieving slight negative pressure so air is drawn through the exhaust path, which also helps keep odors contained.
5) Prevent common setup problems before adding more plants
Before expanding, perform a dry run: run lights and ventilation for a few hours, then check:
- Temperature stability at the canopy level.
- Air movement across the leaves.
- Light height so seedlings are not overheated or underexposed.
- Water level behavior in the tray to ensure sponges remain correctly positioned.
Conclusion
Building a grow tent hydroponic setup becomes straightforward when the work is staged: assemble the tent, add internal structure like a shelf, then establish a DWC foundation with carefully spaced holes, properly sized sponges, and correct initial water contact. Pair the hydroponic build with reliable ventilation, stable lighting, and simple monitoring, and the system becomes ready for an efficient prototype phase with leafy greens.
Practical takeaway: Start with a compact configuration, validate airflow and temperature, then scale the shelf tiers or increase planting density once the environment performs consistently.
Leave a Reply